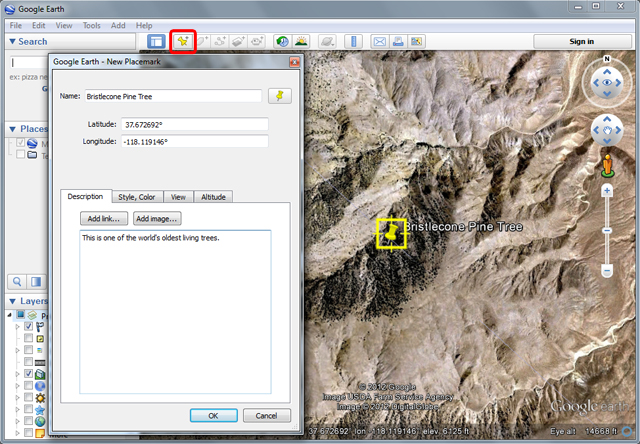
Click the
Add Placemark button

in the toolbar. A placemark is automatically added to Google Earth. Also, a
New Placemark dialog box appears.
- Move your placemark's location by clicking and dragging its icon, or by typing a latitude and longitude into the New Placemark dialog box.
- In the New Placemark dialog box, type in a name for the placemark in the Name field. In this example, we typed "Bristlecone Pine Tree".
Type in a description for the placemark in the Description field, which will be displayed when a user clicks on the placemark. In this example, we typed "This is one of the world's oldest living trees."

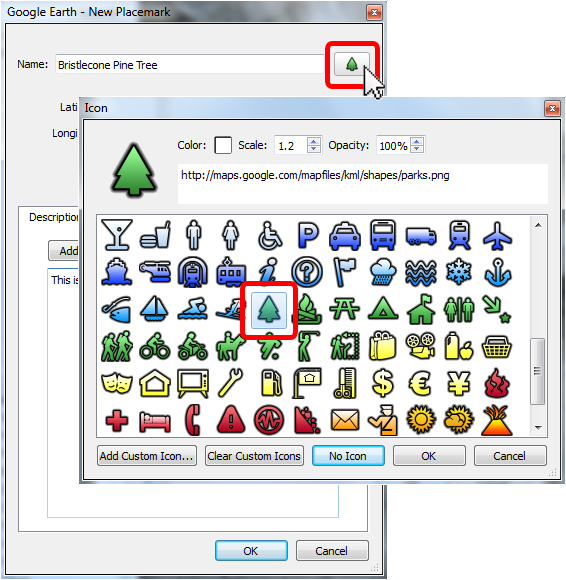
Click on the icon button in the top-right corner of the window, and choose an icon for your placemark and press OK. In this example, we chose a tree icon.

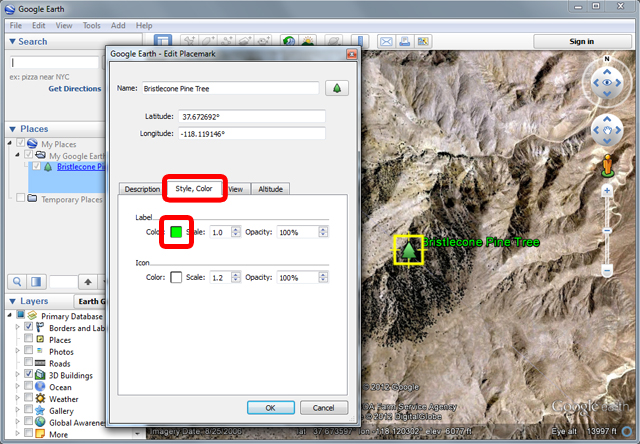
Click on the Style, Color tab, and choose a color, scale (or size), and opacity for the placemark icon and label text. In this example, we choose to change our label color to green.

When you are finished creating your placemark, click OK and your placemark will appear in the Places panel. When you click on your placemark's icon or hyperlinked name in Google Earth, a pop-up balloon will appear with your placemark's name and description.

 in the toolbar. A placemark is automatically added to Google Earth. Also, a New Placemark dialog box appears.


